
 I just purchased this paper pack, called The Homemade Christmas Stack from DCWV, on sale at JoAnn's yesterday. It's very county-ish, but I just fell in love with the colors and the paper is a heavier weight, perfect for templates. The design of this particular paper was perfect for this box from My Time Made Easy called Wonderfully Wrapped. The dp looks like pieces of fabric are stitched together, making it look like real fabric!
  This box takes a different twist on the traditional gable box. The sides are like wings that "wrap" around the sides. I've held them together with a pretty red brad. To give it more interest, I wrapped a red ribbon around the box and added some gold and green bells to the bow.
  The tag was cut with a Cuttlebug tag. The sentiment is actually two separate sentiments from the Secret Santa set from MTME. I stamped them in Riding Hood Red and Garden Green inks. Can you see the faux stitching on the dp? It looks so real!
Oh! I bet you are wondering what's inside the box! I almost forgot. It's a door hanger that's sort of like a pillow in the shape of a snowman's face. Too cute! I thought it would look good on Melissa's door (she's our assistant principal).
I have two more to share this week, so please stop by for those! Thanks for stopping in! I hope you are busy little elves!


 I used another retired dp from SU called Frosty Day. I've always loved the non-traditional colors of this dp! I ran some bashful blue grosgrain ribbon around the perimeter of the lid and used Scor-tape to hold it in place.
 The oval bashful blue piece was cut with a Marvy punch. The flower design was stamped in chocolate chip with a piece from
 I cut a 6" x 11" piece of card stock and scored it on the short side at 1" and 5". Then turned it to the long side and scored it at 1", 5", 6", and 10". Then I just followed the rest of the instructions for the box. I cut a 3 3/4" x 3 3/4 " piece of dp (SU's retired Dashing) for the top, made this fab flower with the
  I just love these boxes because of the simplicity. And I'm in love with these paper rosettes! It looked so festive sitting on Melissa's desk, too! Thanks for stopping in today. I'll have my second Secret Angel gift posted tomorrow, so I hope to see you then!
 But I'm adding to my stash of Christmas cards (add one more thing to the list: send out cards this weekend!) with this
 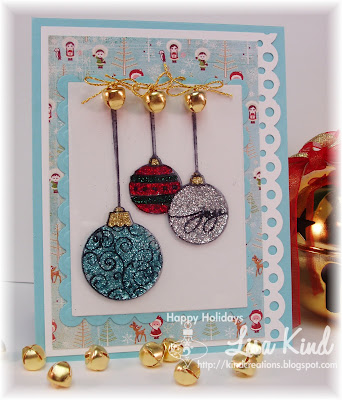 I have to admit that I was going to back out of this challenge because I thought it would take too long and I was very tired last night, but I managed to pull together some energy and try this fun challenge. There is a
  Hi everyone! Today is our
  I LOVE Christmas cut-out cookies with the anise flavoring, so this card made me chuckle! The gingerbread man is from the
 I used one of my favorite stamps sets ever from PMS,
 Cute sketch, huh?
  If you want to see more amazing samples from the Design Team, stop by the
  I actually made this at the end of October when Lauren first revealed it to the DT. I couldn't wait to make it and give it as a gift to my student teacher who was completing her term with me in my classroom. She went to Ghana, Africa to complete her student teaching. The sentiment I chose, from
  I cut the template using SCAL on my Cricut using riding hood red cardstock. The decorative piece was cut from Graphic 45 dp. The colors looked Christmas to me, even in October! The sentiment was stamped on the