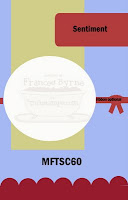
I wasn't planning on playing the Inspiration Challenge on SCS today, but when I looked at it, I found something that I thought I could do quickly. I'm a little stamped-out from all the Christmas stuff I did, but I was able to do this one in literally 15-20 minutes! The inspiration was from a company called MacKenzie-Childs and they have some really eclectic/offbeat designs in their store, and I came across a vase that I thought was interesting.
Here is the picture of the Circus Clown Vase I chose as my inspiration. Isn't this a cool vase? Well, I immediately thought DCWV All Dressed Up paper stack and PTI's Polka Dot Basics stamped in gold. I stamped the dots in Versamark on PTI's Vintage Cream and embossed it with gold ep. I mounted this piece and the dp on a piece of black, tied a red grosgrain bow around it and mounted that on a Vintage Cream base. It looked like a formal New Year's Eve invitation, so I went with the "cheers!" sentiment (from PTI's Take a Bough). I stamped it in Versafine black on Vintage Cream, then I Versamarked a piece of Vintage Cream and embossed it with gold ep to back the sentiment. This made a perfect match to the gold dots! I used the large and small oval punches for the sentiment and the gold piece. Well that's all folks! My stamping room looks like a tornado hit it and I don't have the ambition to clean it up! Maybe in a few days! I hope you enjoyed this post. Enjoy your weekend!
Recipe
Stamps: Polka Dot Basics and Take a Bough (PTI)
Paper: Vintage Cream, black, DCWV All Dressed Up
Ink: Versafine black, Versamark
Accessories: Gold ep, red grosgrain ribbon, large and small oval punches, dimensionals
Saturday, December 27, 2008
Tuesday, December 23, 2008
Some Gifts to Share
I've had a four-day weekend because of two snow days, and thank goodness! I wanted to make some gifts this year for the secretaries at school, my aide, and teacher friends and those days gave me the time to do all these gifts. I did not get to photograph the teacher friend gifts...I was too rushed and forgot! I made fudge (if you want to call it that!) and poured it into various tins I had. The tins were decorated so nicely, but the fudge did not set and was "sloshy" for a lack of a better term. My friend, Pam, said I should have called it Chocolate Lava! LOL! Anyway, these are the gifts I did photograph.
Anne Marie Peterson left a comment on one of my posts, and I checked out her blog and saw these cute hot cocoa gifts that she made. I had been saving these boxes that come with PTI stamps because I knew they'd come in handy some day! Well, I took Anne Marie's idea and ran with it! I started by measuring the box. It's 6" square and 1" wide. I cut a piece of Kiwi Kiss cardstock 4" x 6" and scored it at 1 1/2" and 2 1/2" and ran an SU wheel (I don't remember the name of this one...I think it's retired) over the three sections the score lines created in Kiwi Kiss ink. Next, I cut and embossed a piece of Frosty Day dp using the Labels One nestabilities. I chose this paper because of the wording on it and it also dictated my color scheme. It seemed fitting for a hot cocoa gift. This piece was scored as well and taped onto the top piece. I then placed two jumbo brads on top so I could run the Kiwi satin ribbon through it to create the handle. For the bottom inside piece, I had to cut and tape together two pieces of Kiwi cardstock measuring 8" x 1 1/2". I scored both at 1" from each end, creating a tab. These were taped together creating a rectangle that I placed inside the box. It was also stamped with the wheel. I then used PTI's Holiday Tag Collection set for the tag. It was stamped in chocolate chip on vintage cream and backed with a scalloped piece of kiwi kiss. Here's a picture of the top.
Now for the card. I didn't do a full card (I was lazy, I admit it!). Instead, I did a postcard-like card. Again, I used Kiwi and Frosty Day dp. the main image is PTI's Warm Happiness set. It was so perfect for this gift! I stamped the outline of the cup in chocolate chip and the inside polka dot in Kiwi. The shading on the bottom was done in Close to Cocoa (I masked the main image) as was the steam from the cup. Such a cool set. You can change the look of the cup with different stamps. The sentiment is so nice, too. The word "cocoa" is one of three words that fit in that spot. There's also tea and coffee. I used this sentiment with "coffee" in a pop-up gift card you'll see next.
The last gift I gave my Secret Angel was a Tim Horton's gift card. (For those of you who don't know what Tim Horton's is, it's a huge coffee and donut shop located in Canada and the Northeast. Tim Horton was a hockey player for the Buffalo Sabres in the 1970's. He was a very good defenseman. He was in a deadly car crash in Ontario, Canada, and this coffee shop/restaurant is his legacy. I don't drink coffee, but the lines of cars that wait for coffee at ALL hours of the day at the drive-thru prove that people love it!) Katie had said she loves Tim Horton's, so I got her a gift card. I decided to try one of these pop-up gift card holders I had seen on an SCS challenge here. You simply take a 4" x 12" piece of cardstock and score it at 4" and 8", per the instructions. I also scored it at 6". So you fold on the 4" and 8" score lines in the same direction, and the 6" in score line in the opposite direction. This is what it looks like when folded. I ran some tape along the inside edges to close it up and took my word window punch and punched the opening. I had to punch it 2 times to get a big enough opening. I used the same stamp set, but you can see I changed the look of the cup with a different inside stamp. The sentiment is from PTI's Holiday Treats. I backed the card with a 4.25" square of chocolate chip to make it a larger card.
Here is another pop-up gift card I made for my aide. I got her a Bath & Body Works gift card that had trees on it, so I decided to use this tree stamp from Holiday Tag Collection. I used kiwi kiss and riding hood red cardstock along with Holiday Treasures dp. I placed red dew drops on the brown part of the dp. I also backed it with a 4.25" square piece of riding hood red. The sentiments on the inside are from SU and PTI's Holiday Treats set.
These were a big hit with the recipients. I hope you enjoyed them and that I gave enough information for you to recreate them. If not, please email me or leave a comment and I'll get back to you. I still have to make thank you cards for all the gifts I received from students and friends. That will be in a few days because I'm tired and I still have to wrap my gifts and make a cheesecake! I'd like to wish all of you a wonderful holiday with your family and friends and I'd like to invite you to please stop by again. I love to read your comments and I wish more of you would comment. You can't imagine (or maybe you can) how nice it is to read them! I truly look forward to reading them. Thanks to all my frequent commenters (is that a word?) for making my day and thanks to all of you who subscribe! Merry Christmas!
Labels:
Christmas,
Gifts,
Papertrey Ink,
Pop-up Gift cards
Monday, December 22, 2008
One Sketch ~ Three Cards
I have three cards to share with you today that follow the same sketch from Our Creative Corner. All three images were colored over the summer while I was trying to get a head start on the Christmas cards. All three of them became cards this weekend...how's that for planning ahead!?
I love snowmen and when I saw this guy at a stamping show I went to over the summer, I had to have him. The only problem is I bought this stamp unmounted and don't know where he's from! He's an orphan, I guess, that I adopted! (ETA: I just found where he originated! He's from Rubber Cottage and here is the link.) Anyway, I colored him last summer with copic markers, added some glitter to the snowflakes, and he was ready to be dressed up and mounted on a card! I used Riding Hood Red as my main color and SU's Ski Slope dp mounted on Kiwi Kiss. The red snowflake was punched with a Martha Stewart punch and I put Diamond Dust chunky glitter on it. I've seen Cheryl Rowley use it on her cards (she said she saw Anna White using it), and I realized that I had some of that from another project I did a few years ago! It's a cool look! I ran the white paper through my cuttlebug using the snowflake folder. The ribbon is Riding Hood Red taffeta ribbon and the sentiment on the inside is from PTI's Holiday Wishes.
On the other two cards, I used Gina K. Designs Got Snow set. They are both colored with copic markers and SU's Pacific Point cardstock and dp and Riding Hood Red taffeta ribbon. I used SU's scallop border punch on the left one and a Martha Stewart scallop border punch on the right one. The snowflake is made the same way as in the one above. I put stickles on both images. I hope these are the last cards I have to do, but I think I need two more! I'll also be posting some gifts I've made for friends at work. And speaking of work...we have another snow day today! I can get more things done! Well, have a great day and thanks for stopping by!
Labels:
Christmas,
Copic Markers,
Gina K. Designs,
Rubber Cottage
Sunday, December 21, 2008
Angelic Silhouette
Every year I make a special card for my mom and my in-laws. It's always a bigger size (5.25 square) and sometimes it's difficult to fill up that space. But with this stamp (from Inkadinkadoo called Christmas Silhouettes), it wasn't difficult at all because it's so big! I bought this clear set with my MIL in mind because she loves angels. I started by stamping it in Versamark on PTI's vintage cream (the paper looks white in the picture, but it's a very creamy color) and embossing it with gold ep. I backed it with a layer of SU's brushed gold. I needed something on the left side of the card, so I used the cuttlebug swiss dots folder (this is the little narrow folder that comes with other folders in a pack). I also used my Scor-Pal to emboss a couple of lines between the image and the Swiss Dots. I first punched the snowflakes out of brushed gold, but they weren't as shiny as the image. So I took my Versamark and applied it to a piece of cream paper, then poured the gold ep over it and embossed it. Then I punched the snowflakes out of that with a Martha Stewart punch. Now they match the image and shine nicely! I also placed some yellow bling in the center of the snowflakes. For the tag, I used a cuttlebug die, stamped and embossed the sentiment and the edge of the tag with th e gold ep. I backed it with a piece of brushed gold punched with the wide oval punch. The ribbon is an RAK from Cheryl Rowley. I should mention that I went to Joan Fricker's blog, Joan's Gardens, for my inspiration for this card. She has a wonderful blog and sells some great products. In fact, I have to go there to purchase some things today! I hope you like this card...it's so much prettier in person than in this picture. I have another post after this, so please scroll down! Happy Holidays!
Recipe
Stamps: Christmas Silhouettes (Inkadinkadoo), Holiday Wishes (PTI)
Paper: PTI Vintage Cream, SU Brushed Gold
Ink: Versamark
Accessories: Cuttlebug Swiss Dots folder and tag die, corner rounder, wide oval punch, ribbon, gold ep, bling, MS snowflake punch, dimensionals
Season's Greetings in Black & White
I saw this card on Sharon Johnson's blog, No Time to Stamp. She did hers as a simpler version...no dp or embellishments and I thought it was lovely. I just had to glam mine up a bit though! I used this dp I've had for a while in my stash. I got it at my LSS, Buffalo Stamps & Stuff. I was supposed to use it on a card I saw there, but never did, so I'm using it on this one. The stamp set is clear one from Inkadinkadoo called Ornate Christmas. Their stamps are so pretty...I have several of these sets and they do not disappoint! I used Versafine black ink and it left such a nice, crisp image. This is pretty simple. The base is PTI white, and I used SU's black. In the corner are 3 black glitter dots that are adhered with glue dots. I think I got these from Gina K. Designs. The sentiment on the inside is from PTI's Holiday Wishes. I think this is such a classy card and I bet it would look good in other colors as well, especially red or SU's Pacific Point blue! Hmmm, I may have to try it! Thanks for stopping by!
Recipe
Stamps: Ornate Christmas (Inkadinkadoo), Holiday Wishes (PTI)
Paper: PTI white, black, dp unknown
Ink: Versafine black
Saturday, December 20, 2008
A Blue Snowflake
I actually made these cards for two challenges from yesterday. The Limited Supplies Challenge (LSC199) on SCS and the Taylored Expressions Sketch Challenge. You can see the sketch at the bottom of this post. The card on the left is actually the second version of the sketch I did and it is more true to it. The card below is the first one I did and it didn't really follow the sketch, but did follow LSC199 and I liked both of them, so I'm posting both!
They both use PTI's Vintage Cream as the base and this shimmery, textured blue paper that I got at my LSS, Buffalo Stamps & Stuff, a long time ago. The dp is Basic Grey's Two Scoops and the colors go together fabulously! The snowflake is from SU's Snow Swirled. The sentiment on the first one is from PTI's Holiday Tag Collection set and the other sentiment is from Rubbernecker. I used two different ribbons...the first is Certainly Celery grosgrain (SU) and the other is Spring Moss grosgrain (PTI). Since this was for a limited supply challenge, I didn't add anything other than the ribbon, but I may add some sparkle to the snowflake, like some crystals or crystal stickles. Thanks for stopping by and TFL!
Stamps: Snow Swirled (SU), Holiday Tag Collection (PTI), Rubbernecker
Paper: PTI Vintage Cream, shimmery blue textured (unknown), Two Scoops dp (Basic Grey)
Ink: Baja Breeze
Accessories: Certainly celery grosgrain ribbon (SU), Spring Moss grosgrain ribbon (PTI), Creative Memories decorative corner punch, nestabilities, Martha Stewart border punch, dimensionals
Friday, December 19, 2008
A Blue Christmas
I'm home today because of a bad snow storm here in Buffalo, NY. We have our first SNOW DAY!!! I was so happy to get the call at 5:50 a.m. that school was closed! I wasn't feeling well today and was glad to be home! So I'm stamping all day! Woohoo!!
I'm posting this card for a couple of challenges. First of all, today's Limited Supplies challenge on SCS (LSC199) was to do a card mostly in blue. (OK, I just realized that this was a Limited Supplies challenge and not a Ways to Use It challenge. I was supposed to use only one non-paper embellishment. I used two...the ribbon and glitter dots. I'm entering it anyway!) So I went in search of blue paper and found quite a few sheets of this shimmery textured blue paper I got at my LSS, Buffalo Stamps & Stuff, eons ago! It wasn't sturdy enough for a base, so I placed it on top of PTI's white (the only white I'll use as a base). Ialso found this pretty Offray ribbon in my stash that matched so nicely. Then I found out about the Festive Flourishes Friday challenge on Silke's blog (My Life), and decided to play. It was similar to today's WTC to use blue, but also to use a Flourish stamp. I only have this one, Flourished Christmas, which I love, so I decided to go with the blue, white and silver theme. I stamped the tree and sentiment in Versamark and embossed it in silver (it may look like gold, but it's silver). I also used SU's brushed silver cardstock. The layout is from this week's Sketch challenge on SCS (SC207). I just turned it the other way to accommodate my image. I placed two white glitter dots in the bottom corner and the sentiment was punched with nestabilities. Very easy card to reproduce. I hope you are all snug and safe today if you are experiencing any inclement weather. Enjoy your weekend! I have another post below, so be sure to scroll down!
Recipe
Stamps: Flourished Christmas (Flourishes)
Paper: PTI white, shimmery blue textured (unknown), brushed silver (SU)
Ink: Versamark, black Versafine
Accessories: Offray ribbon, glitter dots, silver ep, dimensionals, nestabilities, corner rounder
Wintergreen Box in a Bag
Have you ever forgotten to buy someone a gift around the holidays? Well, I did the other day! I realized I didn't have a gift for the girl who has been doing my nails for many years! I had an appointment at 6:30 in the evening and had to come up with an idea quick. I had some Hershey Nuggets and mini Reese Cups, so I decided to make this "box in a bag". It's such a cute little thing and super easy to make. You can go to this post to see where I got my directions. I used SU's retired Wintergreen dp and retired Soft Sky cardstock. I just got a new Martha Stewart border punch and used it on the bottom piece. The snowflakes are something I picked up last year at AC Moore. They are foam stickers with glitter on them. Easy peasy! The tag is from a retired SU set called Tags So Much, which I believe I purchased from Holly (Toy) when she had a yard sale before her move from Buffalo to Colorado. It's stamped on Soft Sky in Always Artichoke and backed with a piece of white paper. I punched the soft sky piece with the small tag punch and the white piece with the large tag punch. I used a piece of Soft Sky stitched ribbon to tie it together. Paige loved her gift. I liked the package more than the contents, but that's just me (even though I love chocolate)! That's it for today, folks! Please stop by again soon!
Recipe
Stamps: Tags So Much
Paper: Soft Sky and Wintergreen dp (both SU retired)
Ink: Always Artichoke
Accessories: Martha Stewart border punch, foam snowflake stickers, round tab punch, small and large tag punches, red-line tape, soft sky ribbon, Scor-pal
Recipe
Stamps: Tags So Much
Paper: Soft Sky and Wintergreen dp (both SU retired)
Ink: Always Artichoke
Accessories: Martha Stewart border punch, foam snowflake stickers, round tab punch, small and large tag punches, red-line tape, soft sky ribbon, Scor-pal
Thursday, December 18, 2008
Another Altered Tin
Well, today is day 2 of our Secret Angel gift exchange at work. I made another altered tin, but this one is being used as a box for the gift inside. I bought a cute holiday-themed frame for Katie because I was thinking she could put a picture of her little boy in it. I made a mini pizza box, but it was too small. I didn't have any jewelry boxes that would fit the frame either, so I took this tin from my SU felt flowers...it was the perfect size! The flowers were relocated to another smaller tin (I hope I remember that they are in that one later on)! I used SU's retired Dashing dp (still love that paper) on the top of the tin and ran some red grosgrain ribbon around the side of it. The felt snowflakes are from SU and the brad from Hobby Lobby.
Now for the actual gift. I didn't want to leave the inside of the frame empy, and I didn't have a picture of her little boy, so this is what I did. I made my own picture! I used SU's retired Thanks Snow Much set stamped in black Versafine and colored him with copics. The sentiment is from Karen Lockhart. The snowflakes were stamped with Baja Breeze. This is what it looks like on the inside...sort of like a card! I wrapped the frame in some tissue paper too.
Well, that's all for today. Please stop by tomorrow. I should have the gift for day 3 posted! Happy Holidays!
Recipe
Stamps: Thanks Snow Much, 2008 Holiday Tag Collection (PTI)
Paper: Dashing dp, white, Riding Hood Red, vanilla
Ink: Versafine black, copics, baja breeze
Accessories: Scallop and round nestabilities, red-line tape, Felt Flurries, brad (Hobby Lobby)
Labels:
Altered Tins,
Christmas,
Copic Markers,
Karen Lockhart,
Papertrey Ink
Wednesday, December 17, 2008
Altered Altoid Tin
The teachers I work with do a Secret Angel gift exchange every year. We choose a teacher's name randomly and leave gifts in their mailboxes (or wherever) for 5 days. On the 5th day, you are also supposed to leave something for your Secret Angel (the person who gave you gifts for the past 5 days) as a "thank you" for the gifts you received. Yesterday was the first day of the exchange, and I didn't do anything "crafty" to post. I just bought a package of lip balm that was very pretty...no need to spiff it up! Today is day 2 and I bought a tin of chocolate covered Altoids. I never tasted them, but my angel, Katie, likes chocolate and I wanted to alter a tin, so that's what I went with! I used SU's Holiday Treasures dp and Pink Pirouette for the scallop. I stamped the initial (from PTI's Ambassador Monogram set) and the little flower (from PTI's oval borders and corners set) in Riding Hood Red. There is pink grosgrain ribbon running around the lid. The Pink Pirouette piece is up on dimensionals. I adhered everything with red-line tape. I get mine at Oriental Trading. It comes in a pack of 3 widths for about $8.00. I bought a bunch of them last year and I think I'm on my last pack. It goes a long way! This is a very simple project to do once you have all the measuring down. I'll have another post tomorrow of the next gift I'm giving to Katie, so please stop by! Happy Holidays!
Recipe
Stamps: Ambassador Monogram Edition and Oval Borders and Corners (PTI)
Paper: Pink Pirouette, Holiday Treasures dp
Ink: Riding Hood Red
Sunday, December 14, 2008
A Break from Christmas...
I had to take a break from all the Christmas cards I've been making to make a birthday card for my good friend Tracy. Her birthday was last week, but she had a holiday party last night and I gave this card and the softest pair of pajamas for her gift when I went to her house yesterday. I wanted something other than green, red, or blue! I started with this set from Gina K. Designs called Retro Boutique by Rupa Shevde. Tracy was having a "retro" party with her table adorned with snacks that our parents served with they had parties at our age (so cool)! So this set fit right in with her theme for the party. Tracy is also very stylish and has a flair for dressing and decorating. I started by paper piecing this dress with SU's retired dp Uptown. I also stamped it on a piece of PTI white cardstock and ran it through the cuttlebug with a Spellbinder circle die to cut it out and emboss it. It was layered on top of a piece of Lovely Lilac cardstock that was cut and embossed with a scallop circle die. I used So Saffron as my layer on top of the PTI white base. Another piece of Uptown was layered on a piece of lilac. A Martha Stewart punch finished off the bottom of the card. The sentiment is from PTI's Simple Little Things and was punched with the large oval and layered onto a lilac piece punched with the key tag punch. I added some shine with Spica glitter pens, which I don't think shows up very well, but shines so subtly! The layout is by Frances (aka Stamp Owl) for My Favorite Things. The ribbon is from Target...quite a bargin. I got it in the wedding section. Oh, and the flowers? Last minute idea because of a black smudge on the dress! UGH! Too late to start over, so flowers and bling it had to be! I also dressed up the inside with the purse and sentiment stamp from Rupa's set and another punched lilac piece. Well I have to get going and decorate my tree. We cut it down yesterday (a tradition that my dh and dog have done for years), and I got stuck in the deep snow many times and dh had to pull me out! The area south of Buffalo (where we got our tree) has gotten socked with so much snow and it's really deep! It was a beautiful sunny day, though, with the pretty, soft snowflakes falling gently! We had fun and got a beautiful tree. I'll post a picture when it's done. Thanks for stopping by!
Recipe
Stamps: Retro Boutique (Gina K. Designs), Simple Little Things (PTI)
Paper: PTI white, lovely lilac, so saffron, Uptown dp (SU retired)
Ink: Adirondack black
Accessories: Nestabilities, MS lace punch, large oval and key tag punches, white ribbon (Target), Spica glitter pens, dimensionals, primas, bling
Friday, December 12, 2008
Joy
Hi everyone! I hope you are not stressing too much this holiday season. I was shopping all last weekend and got a lot done...even some cards! I'm scheduling these cards to post one each day so I have some for you to look at every day instead of posting them all at once! I figured out how to do that recently, so pat me on the back! LOL! When I was going through my Christmas stamps, I came across this set from Darcie's Stamps that I purchased at a stamp show in Buffalo this summer. You can see the post here of all the stuff I bought! I went with Cheryl Rowley and I think we burned a hole in our credit cards! I realized that I had colored an image from this set and was totally happy! You know how happy you feel when all you have to do is find a layout for your card and just put it together? It's a great feeling! The card went together in a snap! I used Amy Rysavy's layout Amyrs45. (I'm not sure if I'm allowed to link anyone's blog anymore because there is something going on about hijacking blogs...I'm confused about it so I won't link anything unless I know the other person/company is ok with it. I know Cheryl won't mind, right Cheryl?) I used DCWV Christmas Stack again because it was out on my table and PTI's white as my base. This is the only white I've found so far that is heavy enough to use as a base. SU's whisper white is too flimsy. Anyway, I also used green galore and pixie pink for layers and, yes, orange for my snowflakes! Have you ever seen orange snowflakes? Me neither, but I had to bring in the orange somewhere and the snowflakes were it! The image is colored with Prismacolor pencils and gamasol and crystal stickles were added for some shimmer. I also added stickles to the snowflakes and placed some bling in the middle of each one. The sentiment is from SU's The Snowflake Spot (retired). The sentiment on the inside is from the Darcie's set. Hope you like it. Stop by again tomorrow...I have another to show you! Thanks for stopping by and Happy Holidays!
Recipe
Stamps: Darcie's Stamps, The Snowflake Spot (SU retired)
Paper: PTI white, pixie pink, green galore, only orange, DCWV Christmas Stack
Ink: Adirondack black, pixie pink
Accessories: Prismacolor pencils, gamasol, crystal stickles, bling, Martha Stewart snowflake punch, dimensionals
Recipe
Stamps: Darcie's Stamps, The Snowflake Spot (SU retired)
Paper: PTI white, pixie pink, green galore, only orange, DCWV Christmas Stack
Ink: Adirondack black, pixie pink
Accessories: Prismacolor pencils, gamasol, crystal stickles, bling, Martha Stewart snowflake punch, dimensionals
Thursday, December 11, 2008
Every Snowflake...
...is a package of holiday blessings. That's the sentiment on the inside of this card. I really like that sentiment by Penny Black. I've had it for some time and I don't know that it's seen ink before today! This card is for the Sketch Challenge on SCS (SC206). When I first saw it, I knew I had to use it. I couldn't find any holiday stamps small enough to fit on the 1" circle, so I used my Martha Stewart snowflake punch on top of the circle instead. Not much stamping on this one. I needed to do a quick one because it's late and I'm tired today. The base is PTI white and I layered baja breeze and Ski Slope dp on top. I ran the small rectangular baja breeze piece through the cuttlebug using the swirls folder. The snowflakes were punched from real red paper and I placed a white glitter dot in the middle. The ribbon is PTI's Pure Poppy and the sentiment is from Rubbernecker. Very simple card, but I think it's kind of cute! Here's a picture of the inside sentiment. Hope you enjoyed today's card. I'm on a roll this week...I have another to share with you tomorrow. Nothing else is getting done around here, but I'm cranking out cards! (LOL!) Have a great day and Happy Holidays!
Recipe
Stamps: Rubbernecker, Penny Black
Paper: PTI white, baja breeze, real red, Ski Slope dp
Ink: Adirondack black, real red
Accessories: Martha Stewart snowflake punch, 1" circle punch, ticket corner punch, glitter dots, PTI Pure Poppy grosgrain ribbon, swirls CB folder, dimensionals
Recipe
Stamps: Rubbernecker, Penny Black
Paper: PTI white, baja breeze, real red, Ski Slope dp
Ink: Adirondack black, real red
Accessories: Martha Stewart snowflake punch, 1" circle punch, ticket corner punch, glitter dots, PTI Pure Poppy grosgrain ribbon, swirls CB folder, dimensionals
Subscribe to:
Posts (Atom)