Saturday, December 31, 2011

Just Us Girls #117 - Wild Card Challenge

Happy New Year everyone!  It's hard to believe another year has gone by!  So much crafting!  I should do a year in review like I did here last year.  No time right now...maybe tomorrow or Monday.  It's always fun to look back and reminisce. 

Today I'm here with the last Just Us Girls challenge for 2011.  It just so happens that it's the 5th week of the month (which means Wild Card challenge) and that I'm the hostess!  So I've chosen to challenge everyone to use felt on their creations.  I love felt and this is the perfect time of year to use it, too!
I'm so done with Christmas cards, so on to the next holiday...Valentine's Day.  I was looking for a die to use and picked this one from My Favorite Things called Hearts a Plenty.   Never been used, so perfect choice!  I used PTI felt in red, pink, and white.  The paper is from a Bo Bunny pack from last year.  The sentiment is from Verve called Feeling Groovy.
Simple card using a FTL sketch that I just love to use!  I altered it a bit, as you can see.
Check out what the girls have done.  You can see their creations on the JUGs blog or at their personal blogs.


Thanks for stopping by!  I hope you have a fun and safe New Year's celebration!

Photobucket

Saturday, December 24, 2011

Just Us Girls #116 - Technique Challenge

Merry Christmas Eve!  The Just Us Girls team has an easy challenge for you brought to us by our very talented Kathryn!  Thank you Kathryn for this easy-peasy challenge!  I did mine this morning in about 15 minutes!  I was too exhausted after cooking and wrapping all day long to do it last night!

The challenge is to make a pillar sleeve for a candle.  Such a great idea!  It makes for nice last minute gifts!
I wasn't sure I'd be able to play as I don't have many candles in my home.  I'm so afraid of burning the house down!  Our house was totally destroyed by fire about 10 years before we purchased it, so I'm a little gun shy when it comes to fires in the house!  But I did manage to find one (you can see it's never been lit!).  And it took me all of 15 minutes this morning to decorate it!  I used SU's Jolly Holiday paper, some velvet ribbon, silk poinsettias, a couple of gold glitter dots, some glue dots, and some Scor-Tape to pull this all together.  All the materials right at hand!  It's sitting on my china hutch in my dining room in all its glory right now! 
Just remember to be careful when burning your holiday candles this holiday season or at any time of the year!  We want you to all be safe!

Stop by the JUGs blog to see the lovely candles the girls created for this fun challenge!

I hope you have a Merry Christmas Eve!  Santa is getting ready to fly his sleigh and deliver all those packages for all you good little crafters!  Enjoy your time with your family and friends!

Photobucket

Friday, December 23, 2011

Some Final Christmas Cards!

Wow, it's been a long time since I've posted!  Lots has been going on...Christmas shopping, work, my husband retired!  Yippee!!  Life has been good indeed! 

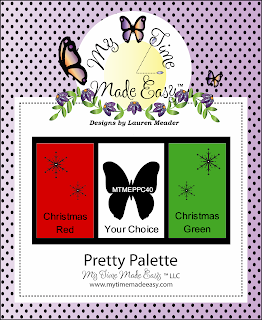
I always leave my family's cards to the last.  Why is that?  I'm always scrambling to get them done!  The first one is for my mom and in-laws.  It follows the Pretty Palette colors (which I am a week late in posting!).  Here are the colors we came up with...pretty predictable for this time of year!
And this is the cutie I made. It uses the Made of Snow digital stamp set from My Time Made Easy and the sentiment is from the Season's Greetings Holiday Sentiment set from Paper Makeup Stamps. My mother-in-law loves these easel cards because she says my cards are always top heavy (she's right!) and fall over! So these cards stay up nicely. I used Always Artichoke and Cherry Cobbler as my base colors and the bird dp is from Memory Box. The others are scraps from packs I've been using all season. I saw this card by Korin Sutherland in SCS and was blown away by it's beauty, so I cased the layout. I wish I had that paper she used!

Next up are cards that I've made before, but turned them into easel cards as well.  These were made for my family that I just met this summer in Poland.  I hope they enjoy them!  The first one uses a stamp from JustRite Stampers.  I love how the center image looks like a fancy ornament.
This last one uses an image from Inkadinkadoo.  It's embossed with gold embossing powder and uses brushed gold paper from SU. 
I hope you have a wonderful holiday with those you love.  I may be back with some templates I'm (hopefully) making for gift cards for my nieces.  We'll see...it may be more like next week sometime!  Merry Christmas!

Photobucket

Sunday, December 11, 2011

Pretty Palette #39

Hello friends!  I'm putting up my tree today.  Kevin, Lizzie (our Springer Spaniel), and I went to cut it down yesterday.  As we pulled up, we saw some new signs..."No Dogs beyond this point"!  Yikes!  Lizzie was already crying to get out of the car! (Warning:  Stop reading if you don't like dogs!)  We took her anyway and met another couple with their Springer!  Then as we were leaving, two other cars pulled up with their dogs!  It's just part of the tradition taking the dog to cut down your tree!  She had fun and so did we!

Well, today is another Pretty Palette challenge from My Time Made Easy.  I love these colors!
I chose to make another Christmas card.  I just can't seem to have enough of them.  I chose this gift package from the Well Rounded digital stamp set and paper pieced it with the 12 Days of Snow Flakes digital paper in pink.  The ribbon on the gift was colored with copic markers.  I added the satin ribbon and topped it off with a paper snowflake and pink crystal.  The sentiment is from Secret Santa stamp set.
I used this sketch from Stepping Stones.  I liked the simplicity of it.
For more inspiration, stop by the MTME blog.  The girls did a fabulous job with this color challenge!  Thanks for stopping by!


Photobucket

Saturday, December 10, 2011

 Hi friends!  Just Us Girls has a fantastic challenge for you this week!  It's our technique challenge week and our lovely Kathryn chose the Center Step technique.  What fun cards these are to create!
So here's what I did.  I saw a card in the Center Step card gallery on SCS (sorry couldn't find it again) that created a door for the focal image.  I thought it was a really cool idea and just had to create one as well1  I've had this die and Wreaths of Joy stamp set from Taylored Expressions for a while and it was screaming to be used.  I created the base of the card using Riding Hood Red cardstock.  The door was created using pieces of the cardstock which I ran through the woodgrain plate.  The woodgrain was accentuated with some distress inks.  The wreath was cut, stamped, and colored, then I added the ribbon.  It was attached to the door with dimensionals.  The dp is from SU's retired Holiday Treasures.  The sentiment is from a PTI set. 
Here's a side shot of the card so you can see the folds of this fun card.  I was pleasantly surprised at how easy this card was to create!
Stop by the JUGs blog for more inspiration from our fabulous JUGs design team.  Thanks for stopping by!

Photobucket

Wednesday, December 7, 2011

Paper Makeup Stamps December Blog Hop

Hi everyone!  Today is our monthly Paper Makeup Stamps blog hop.  We have a wintery theme going on here on the hop. You should have arrived from Janette's blog.  If not, go to the PMS blog

Before I continue, I wanted to let you know that PMS is discontinuing its rubber line of stamps and is going totally digital!  So there is a huge rubber sale going on at a discounted price.  You can read more about it in this post on the PMS blog

Back to the card.  I chose to use this Oo La La for Santa set (which has never seen ink!).  It's colored with copics, I added sparkle with silver and gold Spica pens, and liquid applique for the fur.  There are also some Kaiser pearls added on the side to balance it out.  The sentiment is part of the set and was punched out with an oval punch.  It's attached to the kraft taffeta ribbon with some baker's twine. 
 I used this sketch from this week's Card Patterns sketch.  I changed out the oval for a circle.
Your next stop is Dawn's blog.  I have the list of participants listed below in case you get lost on the hop.


Thanks for stopping by and enjoy the hop!
Photobucket

Monday, December 5, 2011

Tim Holtz's 12 Days of Christmas Tags - Day 2

Have you seen Tim Holtz's blog this week?  He's started his annual 12 days of Christmas tags.  I was very intrigued by Day 2's tag.  You can find it here.  He used his fabulous deer die on his tag.  I used the Deer Trio die from Memory Box.  I followed his steps but modified it a bit because I didn't have all the products he used.  I was very pleased with the outcome.  However, the back side is not so pretty!  I guess I have to cover that with more dp or something!
 Thanks for stopping in today! 
Photobucket

Sunday, December 4, 2011

Pretty Palette #38

It's Sunday and time for another Pretty Palette color challenge from My Time Made Easy
These colors are warm and fuzzy colors to me, so I used the new Winter Knits digital stamp set and Warm Sentiments digital stamp set.  I printed it out the hat, colored it with copic markers, and cut it out.  Then I printed out the sentiment and cut it out with a circle Nestie.  The circle and hat were mounted on a piece of Cherry Cobbler that I ran through the snowflake embossing folder.  That was then mounted on a piece of Daffodil Delight cardstock.  For some bling, I added the green and red crystals and some Star Dust Stickles on the pom and fringes of the hat.
 The sketch is from this week's Clean and Simple Fall to Layout.
Check out the MTME blog for more inspiration from the design team.  Thanks for stopping by!


Photobucket

Saturday, December 3, 2011

Just Us Girls #113 - Sketch Challenge

It's Saturday and time for another challenge from Just Us Girls.  It's the first Saturday of the month, which means it's sketch challenge week.  Elise is our fabulous hostess this week, and she created a great sketch!
Here is a better view of the sketch.
 And here's my interpretation of the sketch.  I was feeling vintage-y today, so I used the Lost and Found Christmas dp from My Mind's Eye.  The Santa image is from Impression Obsession.  I colored the hat and face with prismacolor pencils and gamasol.  The fur on the hat and the beard were covered in Martha Stewart fine glitter.  I just got this Jingle Bell die from Memory Box and couldn't wait to use it.  I cut it out of Cherry Cobbler paper and only used 5 of the bells on the side.  The ribbon is some seam binding from Debbie Marcinkiewicz's Etsy store and the fern is a Martha Stewart punch.
Because it's the first Saturday of the month, we have a new Featured Designer...Lenet Mos.  You can also stop by the JUGs blog for more inspiration.  Here are the links to the girls' blogs too.  Thanks for stopping by!


Photobucket

Friday, December 2, 2011

My Time Made Easy A Year in Review: A Box is a Box

Happy Friday!  Today I'm here with the My Time Made Easy Year in Review post.  This is where we use the old with the new.  I'm using the new A Box is a Box template with some products previously released.
This box comes with two design options for the top.  Yesterday I used the petal-top option and today I'm using the traditional box top.  I started by creating the bottom of the box with black cardstock.  The top was created using the Buzz-y Blooms digital paper in the yellow honeycomb pattern.  This template comes with four different cut-outs for the sides:  a snowflake (which I used in yesterday's post), a tree, a leaf, and a flower.  To change things up a bit and to match my theme, I cut the smaller bee from the My Bee Loved cut file on the front and back of the lid.  I love how the bee cut-out is silhouetted against the black bottom of the box.
To top it off, I used the Abra-Bow-Dabra cut file to create the pretty bow.  I cut it out twice with black cardstock to create the full bow.  I also cut some 1" strips of black paper to run it around the top.
I filled the box (which is very big) with Burt's Bees products.  I love how you can create a theme and run with it!
Here's the box full of all these products.  See?  I told you it was big!  (I hate that white piece of filler that is hanging out of the box.  I wish I would have noticed it and cut it off!)

Please stop by the design team's blogs to see what they have in store for you.  Thanks for stopping by!


Photobucket

Thursday, December 1, 2011

My Time Made Easy Release Day: A Box Just isn't a Box

Today is December 1st already!  Where has the time gone?  Today is also release day at My Time Made Easy.  The design team is all using the new template A Box is a Box.  This is a HUGE box and has two design options.  I'm using the petal top option here.  I wanted an elegant-looking box, so I went in search of some ribbon.  I found this ribbon I got at JoAnn's long ago and always loved it.  So I decided to make the box out of brushed silver cardstock from SU to match the silver in the ribbon.
This box also comes with different cut-out options.  There's a flower, a leaf, a tree, and a snowflake, which I chose to use here on the front (and back) of the box to match the snowflakes on the ribbon.  I cut a piece of white cardstock the size of the side of the box and adhered it to the inside so that the contents (Hershey Kisses) wouldn't fall out and so that the snowflake cut-out showed up more.
I added ribbon around the box and tied a big double bow on top.  Then I added some jingle bells and attached them with some silver and white string.  I couldn't discard the snowflake cut-outs, so I strung one from the string and attached it to the ribbon.  It can be used decoratively or as a tag.  Mine is just decorative for the moment.  By the way, only one bag of Kisses is not enough to fit into this box!  To open the box, just take off the bow and the box opens.  I forgot to take a picture of the box open.
You can see and purchase all the new products today on the My Time Made Easy store.  We have two new templates, several new cut files and digital stamp sets, and some gorgeous digital paper being released.  The design team has more inspiration to share with you. Stop by their blogs to see for yourself!  Thanks for stopping in today.   I'll be back tomorrow with another MTME post!


Photobucket

Wednesday, November 30, 2011

My Time Made Easy Preview: Insert Card Here

Hi everyone!  The My Time Made Easy design team is back in swing again previewing products from the new December release.  There's tons to choose from, so you'll probably want it all!  And you can have it all...tomorrow!  Just select, pay, download, and start crafting!

Today we are all previewing the newest template called Insert Card Here.  You'll see in the next photo how it got it's name.  It's a nifty little box.  I started with some new paper called Flakes and Fuzzies.  There are three color versions of the same patterns.  So many wonderful patterns and colors to choose from!  I chose this Snowcomb pattern and cut my template from it.  To make the fabby bow, I first printed another pattern from the same pack called Weave then used the new Bow-Tied cut file to cut it out.  It's so easy to pull together and there are a couple of design options to this bow.  Lastly, I cut a snowflake from the new It's Snowing cut file.  I resized it a little smaller to fit in the middle of the bow.  Then I covered it with some chunky glitter and adhered it to the bow.
Now for the inside.  Here is where you will see where the template got its name.  There's an insert that goes inside to hold a gift card!  This is the way the box was intended to be used, but take out that insert, and you have a nice little box to hold all sorts of goodies!  The sentiment is from the new Warm Sentiments digital stamp set.  I sized it to fit within the lid and colored it in GIMP using the colors of the paper.  And inside the box, I placed a gift card and a little Santa chocolate bar (which I am eating as I type this!). 
If you want simple, you have it with this little box.  It takes minutes to pull together and presents itself so nicely!  For more inspiration from the design team, stop by their blogs.  Thanks for stopping by!  We'll be back tomorrow with the official release day group post!  Hope to see you then!


Photobucket

Sunday, November 27, 2011

Pretty Palette #37

Happy Sunday!  Today we have a new Pretty Palette color challenge from My Time Made Easy.  Here are the colors.
 I decided to make holiday gift tags with this color palette.  I cut tags from kraft and ivory cardstock using two different Spellbinders dies.  The dp is Jolly Holiday from SU and the stamps are from the Secret Santa stamp set from MTME.  The ribbon is kraft taffeta ribbon and I added jingle bells with some baker's twine.
Here are some close-ups of the tags.  I stamped the sentiments in Old Olive and the swirls in Sahara Sand and distressed the edges with Peeled Paint distress ink.


 Stop by the MTME blog to see more inspiration from the design team and thanks for stopping by.

Photobucket

LinkWithin

Blog Widget by LinkWithin