Showing posts with label Just Us Girls Technique Challenge. Show all posts

Saturday, October 11, 2014

Just Us Girls #262 - Trend Week

Happy Columbus Day weekend!  I have Monday off and I'm planning on going to a craft show at Letchworth State Park here in NY state.  They have a really great one all weekend, and I like going on Monday because it's not as crowded.  I'm going to take my niece, Maria, with me too so it will be a nice day.
 
So this week is Trend Week over at Just Us Girls and Sue T. chose the ombre technique.  Love this one!  On a sad note, Sue T. is stepping down as a designer at JUGs.  We will certainly miss her, but understand life comes first!  Best wishes to you my friend!
 
I used Gelatos on a piece of watercolor paper in blue, green, and lime green.  Then I added water.  The blue and the green look splotchy.  I don't know why because I used the smooth side of the paper.  Oh well, I think it looks cool.  Then I die cut it with the plate.  To keep the same texture of the paper, I die cue just the rectangle once again from the watercolor paper and stamped the sentiment.  I colored it with lime green and blue copic markers and added enamel dots.  The die cut was adhered to a piece of pattern paper. 
 
You can see more from the design team and our Guest Designer on these blogs.
 
 
Thanks for visiting today!
 
Recipe
Stamps:  Big Bold Birthday, Taylored Expressions
Paper:  Tim Holtz watercolor paper, Recollections white, Lime Rickey (Basic Grey)
Ink: Versafine onyx black, Gelatos:  blueberry, green tea, margarita
Accessories:  Party Banner cutting plate (TE), enamel dots

 

Photobucket

Saturday, May 10, 2014

Just Us Girls #240 - Technique Challenge

Hi everyone!  The challenge over at Just Us Girls this week is a technique challenge.  Sue V. is the hostess and she chose the Kissing Technique.  I love this technique and I got to use some perfect stamps for this technique.
 
When you do this technique, you want to use a stamp that has a lot of surface area.  I went looking through my stamps and found this retired one from SU.  I stamped the flower in Memento Luxe ink (I found that pigment inks worked best for this technique) and then "kissed" it with Tim Holtz's Reflections stamp.  It left the words imprinted the correct way (not backwards) on the image.  Then I stamped it on the paper and fussy cut it out.  The rest of the card is pretty self-explanatory.
 
The design team did an amazing job with technique.  You can check them out at these blogs.
 
 
Thanks for stopping by!
 
Recipe
Bodacious Bouquet (SU), Boutique Borders: Thanks (PTI), Reflections (Tim Holtz)
Paper:  Neenah white, melon mambo, Delovely
Ink:  Versafine onyx black, Memento Luxe inks: rose bud and pearl tart
Accessories:  Border punch, enamel dots, dimensionals
 

Photobucket

Saturday, April 12, 2014

Just Us Girls #236 - Technique Challenge

Hello friends!  I'm hostess this week over at Just Us Girls and it's technique week.  I chose this water colored background challenge weeks ago, and it seems that I chose a popular technique!   It's all the rage in blogland recently!   
 
I chose to do something very simple with my card.  I just took a piece of Tim Holtz water color paper and embossed the sentiment with Versamark ink and white powder.  Then I wet the paper with a paint brush where I wanted the ink to be, and started coloring.  I used reinkers here because they seemed to give me more vibrant colors.  To finish it off I added a gingham ribbon and some sequins. 
 
You can see more water colored inspiration from the JUGs DT and our guest at these blogs.
 
JUGs blog
Cheryl Rowley
Maria Levine
Marisa Ritzen
Nancy Leppek
Sharyn Polesel
Sue Trembeth
Sue VanDeVusse
Vicki Dutcher
 
Thanks for stopping by!
 
Recipe
Stamps:  Make a Wish (Mama Elephant)
Paper:  Tim Holtz water color paper, tempting turquoise
Ink:  Tempting turquoise, yoyo yellow, regal rose reinkers; Versamark ink
Accessories:  White embossing powder, gingham ribbon, Color Theory sequins 

Photobucket

Saturday, January 11, 2014

Just Us Girls #223 - Technique Challenge

Hi everyone!  Today over at Just Us Girls, Sharyn is hosting the technique challenge and she chose paper piecing.  It's a simple technique that adds so much to an image.
 
I've been seeing so many Valentine cards around blog land, so I decided to make one for my hubby.  And whenever I think of paper piecing, I always think of MFT stamps, specifically the Pure Innocence girls.  I love paper piecing their dresses!  But then I came across this set called Little Loveosaurus and I thought it would be adorable paper pieced.  (I think it's retired because I couldn't find it on their site.)  I love the sentiment too!  I stamped the image on Yours Truly dp from Echo Park and cut it out.  I also stamped it on white cardstock and colored the head, teeth, and triangular things on its back and tail.  I added Wink of Stella shimmer on those triangular things and the teeth, then added glossy accents on top.  It really makes it shimmer!  I did the same with the small red hearts.  The sentiment was stamped on the word bubble die.
 
You can see more fabby paper piecing from the design team and our Guest Designer at these blogs.
 
 
Thanks for stopping by!
 

Recipe
Stamps:  Little Loveosaurus (My Favorite Things)
Paper:  Neenah white, real red, basic gray, Yours Truly (Echo Park)
Ink:  Memento tuxedo black, Versafine onyx black, copic markers
Accessories:  Spellbinder's heart dies, word bubbles die (Paper Smooches), Martha Stewart heart punch, glossy accents, dimensionals, Wink of Stella shimmer brush

Photobucket

Saturday, November 9, 2013

Just Us Girls #214 - Technique Challenge

Are you ready for another technique challenge from Just Us Girls?  I chose another challenge that Jennifer McGuire shared on her blog.   You can see it here.

And so the Christmas card making begins for me!  I chose Papertrey Ink's Polka Dot Parade #9 stamp set to create my background.  I stamped the Merry in riding hood red ink and Christmas in kiwi kiss ink.  The ribbon was added to separate them.  The sentiment is from Two Feet Deep by PTI also.  The clear snowflake I believe is from Heidi Swapp, and I added the white glitter dot in the center.  It's mounted on a lucky limeade card base. 

I was so intrigued by this sketch from CAS(e) this Sketch.  So fun!
You can see more inspiration from the JUGs design team at these blogs.
Thanks for stopping by!
Recipe
Stamps:  Polka Dot Parade #9 and Two Feet Deep (Papertrey Ink)
Paper:  Neenah white, lucky limeade
Ink:  Riding hood red, kiwi kiss, Versafine onyx black
Accessories:  Riding hood red and kiwi kiss taffeta ribbon, clear snowflake, glitter dot

Photobucket

Saturday, October 12, 2013

Just Us Girls #210 - Technique Challenge

 Hi all!  Vicki chose a great technique for the Just Us Girls technique challenge this week.  She chose a technique from one of my favorite designers...Jennifer McGuire.  She calls the technique die cut inlay.  You can see the video tutorial here.

I've actually done this technique before.  You can see my card here.  I went in a different direction this time.  I used Mat Stack #3 and Simply Jane dies for this technique along with some Graphic 45 papers.  I wanted to add some blue into the mix, so I created my own panel using Distress Paints.  This is called the Distress Marbeling technique from Tim Holtz.  I put antique linen, broken china and weathered wood distress paints on my mat and misted it with water.  Then I dragged a piece of vintage cream cardstock through it and dried it with a heat tool.  Then I colored the edges with a gold leaf pen.  I used the gold pen around the edges of the mat of the main image and on the pearls too.

I used the Deconstructed Sketch for my layout.

You can see more inspiration for this challenge on these blogs.

Thanks for stopping by!

Photobucket

Saturday, September 14, 2013

Just Us Girls #206 - Technique Challenge

Hi everyone!  We have a technique challenge going on over at Just Us Girls.  Nancy chose a great one, too!  It's the grid technique and it's a very easy yet really packs a punch!  You can find the tutorial for the technique here.

So I just want to say that I want to die and go to Tim Holtz heaven!  I joined the Chemistry 101 class over at Online Card Classes where Tim is the "professor".  He is just so talented and so knowledgeable about all these cool products that he has developed with Ranger.  Just in that one class, he introduced 25 techniques!  And now he's hosting another class called Chemistry 102 which starts in October!  Can't wait for that!
 
Let's talk about the grid technique first.  I took a piece of 3" x 3" piece of white cardstock and scored lines every 1/2" in both directions.  Then I stamped the background with Papertrey Ink's Background Basics: Morocco in Memento Tuxedo Black.  Then I used some distress inks (I should have put more color down cause it looks light) to add color and then covered it with Versamark and clear embossing powder.  It looks like tile!  Love that!  
 
Here's a close-up so you can see the shine.  And now for that butterfly (I added the pearls to the butterfly body and didn't retake this picture).  I used the Beautiful Butterflies die from PTI to cut out a butterfly from grunge board.  Then I covered it with Rock Candy Crackle paint.  I set it aside to dry while I was doing the grid and of course hit it a couple of times with various things (the lid from an ink pad, scissors, etc.), so I made a few more.  But once this dried it actually was ok.  When it was dry, I applied distress stains to it and heat set it.  So cool!  I have leaves made with the crackle paint drying and waiting to be inked up, so you'll see something with them on the blog soon!

I used the Monday Mojo sketch from this week for my layout.  I left out the panel under the flag cause I didn't want to cover up my grid pattern too much!

Stop by the JUGs blog to see some exciting news we have posted (hint...DT call!) and the design team's cards.
 
 
Thanks for stopping by!
 
Recipe
Stamps:  Background Basics: Morocco, Butterfly Dreams (Papertrey Ink)
Paper:  Vintage cream, Neenah white, Boxer (Basic Grey)
Ink:  Distress Stains:  broken china, worn lipstick, fired brick, faded jeans; Distress Inks:  broken china, worn lipstick; Versamark, Versafine onyx black
Accessories:  Rock Candy Crackle paint, grunge board, Butterfly Dreams die, WPlus9 flag die, dimensionals, clear embossing powder, pearls


Photobucket

Saturday, August 10, 2013

Just Us Girls #201 - Technique Challenge

Hi everyone!  Today over at Just Us Girls I'm the hostess!  Since it's technique week, I chose the shaker card technique.  I've never made one before and have always wanted to make a shaker card. 

I've had these shaker pouches from Impression Obsession for a few years.  My LSS was demonstrating them once, so I purchased a pack.  Really easy to use!  I stared by stamping the flowers that are inside the shaker box.  They are from WPlus9's Fresh Cut Florals stamp set.  I stamped them in Hero Arts inks I recently purchased.  The leaves were stamped in Memento Luxe Pear Tart pigment ink.  Inside the shaker box are some microbeads I've had for a while.  The sentiment and flowers surrounding it are from Folk Art Florals, also from WPlus9.   The stitching above was stamped with PTI's Sew Simple Borders.  The paper is October Afternoon's Sidewalks.

 
 I used this week's sketch from Freshly Made Sketches. 
 Stop by these blogs and see the very different shaker cards the JUG design team created.
 
 
Thanks for stopping by!
 
Recipe
Stamps:  Fresh Cut Florals, Folk Art Florals (WPlus9), Sew Simple Borders (PTI)
Paper:  Neenah white, pool party, Sidewalks (October Afternoon)
Ink:  Versafine onyx black, pale tomato, fresh peach, butterbar (Hero Arts), Memento Luxe pear tart
Accessories:  Square nestie, shake it pouch (Impression Obsession), PTI ribbon, microbeads, scallop border punch 

Photobucket

Saturday, July 13, 2013

Just Us Girls #197 - Technique Challenge

Hi everyone!  It's technique week over at Just Us Girls and Maria chose a challenge that really intimidated me until I sat down and tried it!  This week we are using Mixed Media as our challenge.  She found this great video over at Splitcoast Stampers for you to watch and to be inspired.

I watched this video along with several others, including videos from Tim Holtz and Jennifer McGuire.  Jennifer did a flower similar to this and I loved it and stared there.  The flower is from Papertrey Ink's Delightful Dahlia set.  I stamped it in Versamark on watercolor paper then heat embossed it with white ep.  I applied Spiced Marmalade and Worn Lipstick distress stains, and spritzed it with water to help move and puddle the inks.  I let it sit for a while to dry.  I did the same for the leaf, however I only had Peeled Paint distress ink and no other green inks to get some dimension.  Then I took a Ranger manila tag and applied the Spiced Marmalade and Worn Lipstick inks on the tag and spritzed it with water too.  I heat set it and let the inks move around while heating it.  This is where I stray from the video.  I was supposed to apply Gesso or white acrylic paint to the tag, but didn't have either, so I left it.  I then used a Dylusions stencil (from Ranger) and some pearl Modeling Cream to create this border.  I used an old credit card to spread the modeling cream into the openings of the stencil.  The results were so cool!
 
Since the Modeling Cream was pearl, it really shimmers!  Here's a side view of that.  The sentiment is from PTI's Stylish Sentiments:  Birthday and was stamped in Versafine Onyx Black.  I added some seam binding to the hole.  I'm entering this tag into our county fair in August.

I was so excited about this technique that I decided to make a card for my friend's upcoming birthday.  I did the same technique for the flower, leaf, and background paper.  Except this time I covered the background paper with Picket Fence distress stain.  It lightened it up and muted it a bit.

Again, here is a shot of the shimmer of the Molding Cream.

Here are the two side-by-side.  You can see how the background on the card is more muted.  Love this technique!

You have to check out these blogs to see what the JUGs design team did with this technique.
 
 
ETA:  I'm also entering this in Moxie Fab World's Birthday Tags and Wraps Challenge!  Perfect fit for my tag!

Thanks for stopping by!
 
Recipe
Stamps:  Delightful Dahlia, Stylish Sentiment:  Birthday (PTI)
Paper:  Neenah white, pear pizzazz, Ranger manila tag, watercolor paper
Ink:  Worn lipstick, spiced marmalade, peeled paint, and picket fence distress inks, Versafine onyx black, Versamark
Accessories:  Delightful Dahlia die (PTI), white ep, Modeling Cream (Creative Imagination), Dylusions stencil diamond border (Ranger), dimensionals
 

Photobucket

Saturday, June 8, 2013

Just Us Girls #192 - Technique Challenge

Hi there!  We have a great challenge going on at Just Us Girls.  Our technique challenge this week is to use washi tape on your creations!  It's all the rage lately and there are so many designs of washi tape too!

We are being sponsored this week by Modes4u too!  

Here's some information about the company:
 
Modes4u is an online shop for cute stationery, fabrics, Bento lunch boxes, DIY clay sets, Re-Ment miniature toys and accessories, which are imported from Japan and the USA. The company based in Hong Kong was founded in 2007 by Managing Director Sandra Boch and always stocks several thousand kawaii products. Modes4u is an official San-X online retailer offering free international shipping for purchases over EUR 60 / US$78 / ₤ 54. The online shop is especially active in the field of social media, having more than 60,000 Fans on Facebook, over 4,000 followers on Twitter and an English and German company blog.

The item we are sponsoring from the company is washi tape.  Here are some links to the product:
 

I wanted to make a bright and sunny card today.  Summer is almost here and I love sunny days!  So I used this new set from Reverse Confetti called I Like You.  The paper is called Hello Sunshine from Bo Bunny.  I mounted the senitment and patterned paper on Daffodill Delight cardstock.  I added some washi tape to the sentiment panel and then some Liquid Pearls in cantaloupe color. 


This is the sketch I used from Sketch For You to Try and Reverse Confetti. 
 
So, do you want to win some washi tape?  Play along with our challenge using washi tape (or make your own washi tape - see the JUGs blog for links to tutorials).  Two random winners will win 3 rolls of washi tape from Modes4u!
 
Check out the design team blogs for more inspiration.
 
 
Thanks for stopping by!

Photobucket

Saturday, May 11, 2013

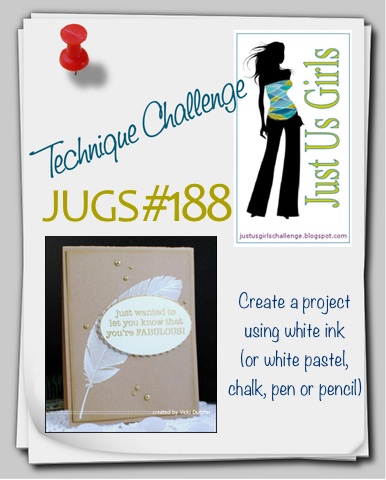
Just Us Girls #188 - Technique Challenge

Hi there friends!  It's been a few days since I last posted....busy week!  But I'm here with a new technique challenge from Just Us Girls.  This week, Tangii came up with a great and easy technique...use some kind of white medium on your creation.  It could be white ink, white pencil, chalk, etc.

I recently took another class from Online Card Classes (His & Hers), and Jennifer McGuire made the coolest card with white pigment ink and dye inks.  I did something similar with my card.  I stamped the solid tree from PTI's Layered Postmarks:  Holiday in their Fresh Snow ink.  I overstamped the postmark print in Always Artichoke.  Then I added too many snowflakes (I never know when to quit!) and used the ink to shade around the kraft card stock.  I stamped the sentiment from PTI's Stylish Sentiments:  Holiday in Versamarkon velum and embossed it in white embossing powder.  I added a couple of sequins to the sentiment.  It's all mounted on an Always Artichoke base.  A sheer ribbon bow tops off the tree.

You can see more great inspiration from the JUGs DT at these blogs.


Thanks for stopping by!  I have Mother's Day cards to share.  Hopefully on Monday!  See you then!

Photobucket

Saturday, April 13, 2013

Just Us Girls #184 - Technique Challenge and a Sponsor!

Hi there friends!  We have a new challenge over at Just Us Girls today.  This week is our technique challenge and Vicki has chosen a really cool technique.  It's called the ombre technique.  It's very popular now in clothing, hair color, cakes, and nail colors (like the pictures in our graphic).  It's a very easy look to achieve.

The most difficult thing for me was coming up with ink colors and stamps to use!  Once I settled on those, it was a breeze.  My 21st anniversary was Thursday, so I decided to make an anniversary card for my husband using this technique.  I chose Background Basics:  Spots and Dots with Old Olive, Kiwi Kiss, and River Rock inks to create the panel.  I was very happy with the results!  To finish off my card, I used these sentiments from Love and Marriage.  I've always loved this sentiment and my hubby likes John Lennon, so I think he'll get a kick out of this!  I cut out the arrow using the Get to the Point die set.  (I used Papertrey Ink stamps and dies.)  I added a button and some twine.

I used last week's Clean and Simple sketch for my layout.

Stop by these blogs to see what the girls created with the ombre technique.
 
 
As a SPECIAL SURPRISE, Cindy from over at Dare 2B Artzy is sponsoring this challenge!
Yep, that's right - the winner of this week's challenge will get to choose the stamp set they want! Thanks so much Cindy -- so generous of you!


Dare 2B Artzy is an unique, inspiring, and contemporary line of clear stamps for the use of card making and scrapbooking. Along with the many stamp designs already created, customizable stamps are also available upon request.
 
Thanks for stopping by today!
 
Recipe
Stamps:  Background Basics:  Spots and Dots, Love and Marriage (Papertrey Ink)
Paper:  Neenah white, kiwi kiss
Ink:  Old olive, kiwi kiss, river rock, Versafine Onyx Black
Accessories:  Get to the Point die (PTI), button, twine
 
Photobucket

Saturday, March 9, 2013

Just Us Girls - Technique Challenge #179

Happy Saturday!  This week just blew right by me! 
 
Just Us Girls has a fun and easy technique for you this week brought to us by our very clever Vicki.  She wants us to use a negative die cut on our creations. 

My card came together really quickly and I used a pretty simple and classic layout.  The hardest part was deciding which die to use!  I decided on the Polka Dot Parade #1 bunny die from PTI 's Polka Dot Parade #1 mini stamp set since Easter is coming soon and I could use some Easter cards.  I once again used October Afternoon's Sidewalks paper.  It's just so springy!   I added a little pom for his tail.

That's it from me!  Check out these blogs for more fabulous inspiration!
 

Photobucket

LinkWithin

Blog Widget by LinkWithin